Getting Started
Installing the CE C toolchain
Download the file prefixed with your OS type from here.
On Windows, run the executable (.exe) as an administrator.
On Linux or macOS:
Extract the archive to a path without spaces (e.g. /opt/).
Add the environment variables with the install location to either .bashrc or .bash_profile, using the extracted path:
export CEDEV=/opt/CEdev
export PATH=$CEDEV/bin:$PATH
Note
If you have defined/overridden the CFLAGS or LDFLAGS variables in your shell, you may want to unset those.
Building Programs
To build programs with the CE C toolchain, the make command/exectuable is used.
This tutorial will guide you through building your first program.
Locate the CEdev folder that you installed. There should be an examples folder which contains multiple projects for you to use for getting familiar with the CE C Toolchain. Navigate to the hello_world example inside this folder.
Building is done by using a command terminal. On Windows, open a command terminal by pressing shift in an empty part of the file explorer and right clicking. You will then see an option to Open command window here, or Open Powershell window here. On Linux or macOS, use whatever terminal you are most familiar with.
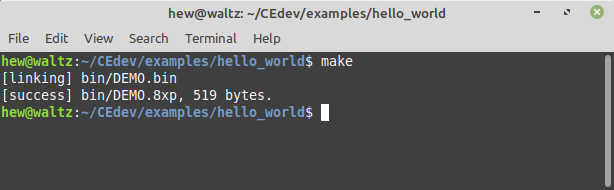
Type make and press enter.
The compiler and linker will be executed, and the program (named DEMO.8xp) will be created in the bin folder, shown in the below screenshot.
CEmu can be used to run the program, or you can transfer it to a real calculator using the cross-platform TI Connect CE.
The following briefly describes the folder structure and files present throughout the toolchain examples:
Folders
src: This is the directory where all of your source files are. Sources are built automatically if they end in a .c/.cpp extension, and can be edited with any text editor (not Word).
bin: This is where the compiled program will be placed.
obj: Compiled C/C++ files are placed here, showing the assembly output.
Files
icon.png: This is the 16x16 icon displayed in shells such as Cesium.
makefile: This file is used by make to build your program. There are options for setting the program name, description, and more.
readme.md: A brief text file that explains what the demo is.
autotest.json: This can be loaded into CEmu’s Autotester to verify the example’s correctness.