Using the Toolchain in an IDE
The CE Toolchain can be used in a variety of Integrated Development Environments (IDEs). The following are currently supported. Raise an issue or pull request on GitHub if you would like to see a different one, or if an IDE update changes the current flow.
CLion
CLion is a C/C++ IDE made by JetBrains.
Open your project in CLion.
If you’re making a new one, make a copy of the examples/standalone_examples/template folder to get a boilerplate Makefile.
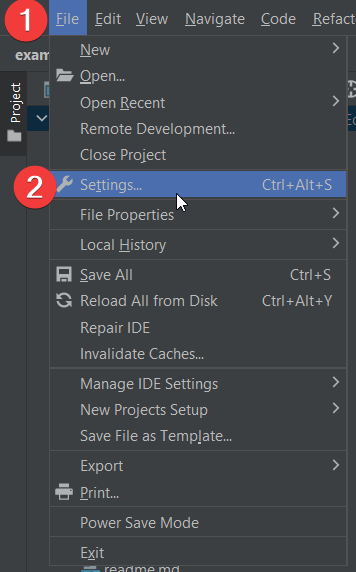
Open IDE settings
This is found under the drop-down option (File > Settings).
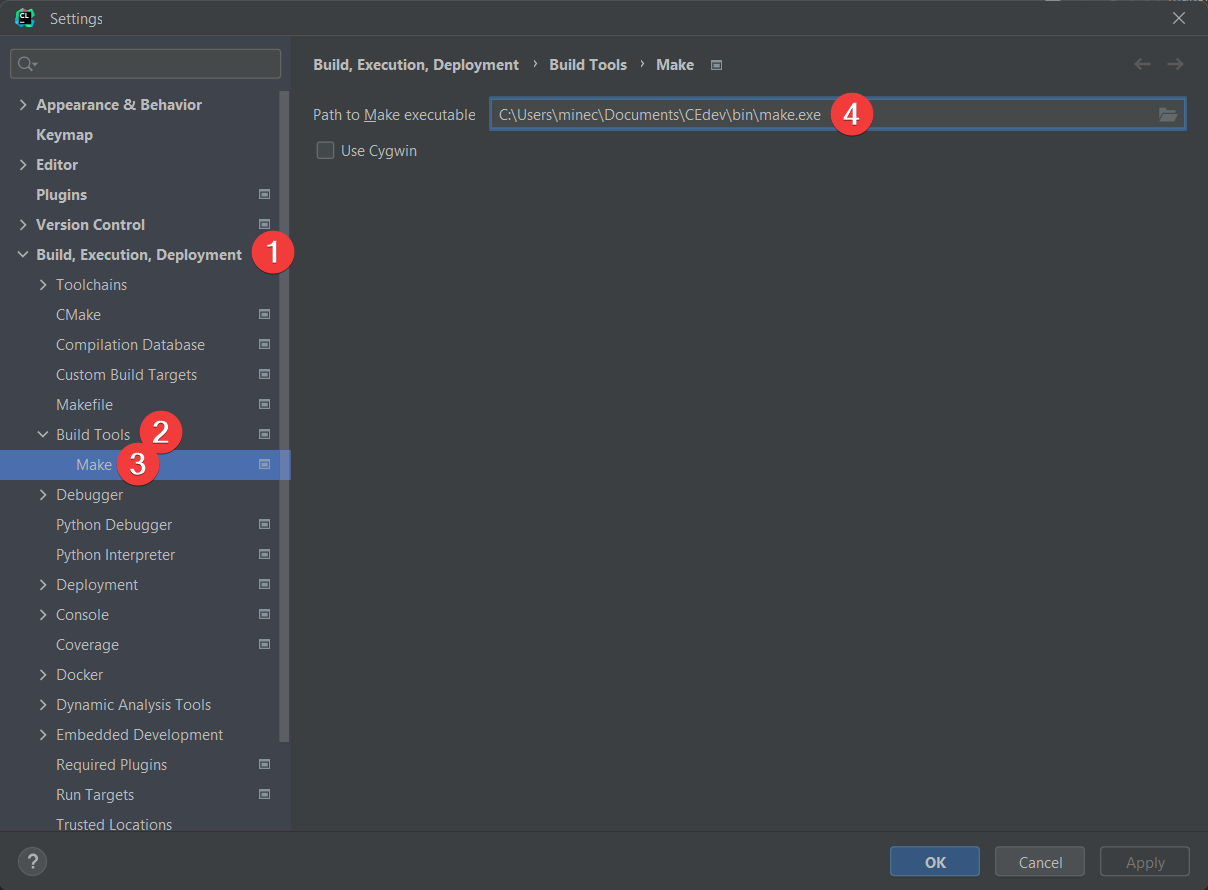
Configure the make executable
WINDOWS ONLY: Set the make executable (Build, Execution, Deployment > Build Tools > Make) to your CEdev bin/make.exe file.
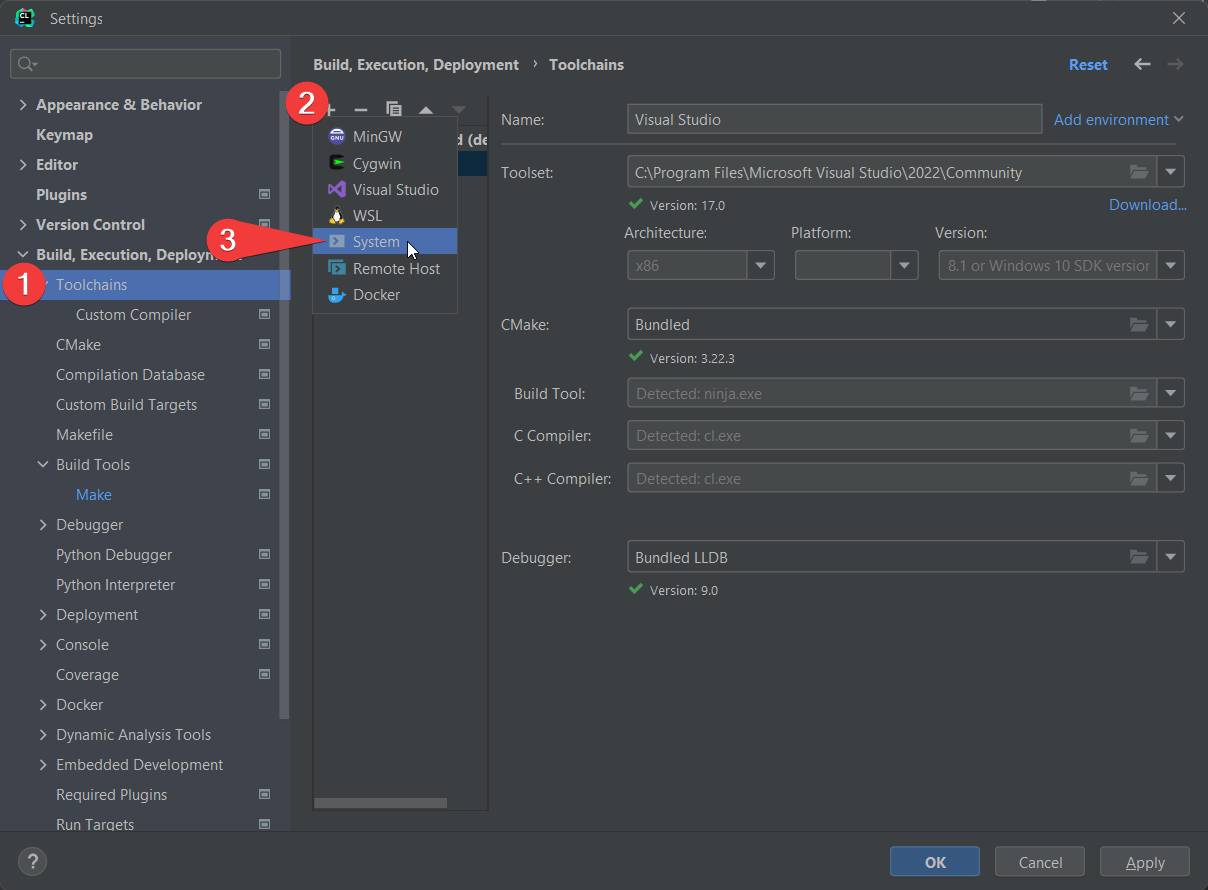
Create CEdev Toolchain
Navigate to the options Build, Execution, Deployment > Toolchains, +, System
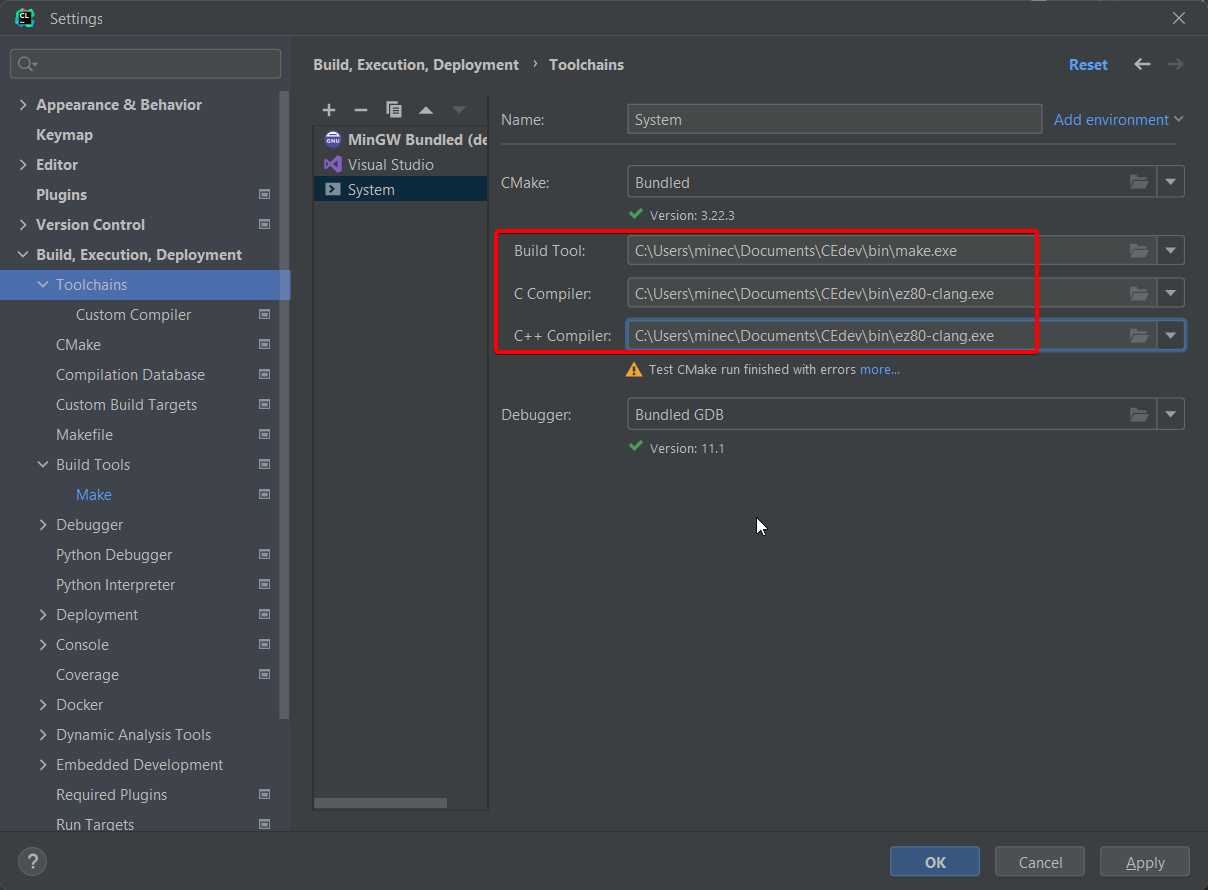
On Windows, set the “Build Tool” to CEdev/bin/make.exe and both C compilers to CEdev/bin/ez80-clang.exe
On macOS/Linux, set both C compilers to CEdev/bin/ez80-clang.
macOS/Linux come with their own system make executable, and the default system one can be used.
On macOS/Linux, you might want to set the PATH to include the CEdev bin folder. Do this by clicking on “Add environment” next to your toolchain’s name and setting it to something like /home/youruser/.cedev.env.
Proceed by making the /home/youruser/.cedev.env file with the following content:
PATH=/home/youruser/.cedev/bin:$PATH
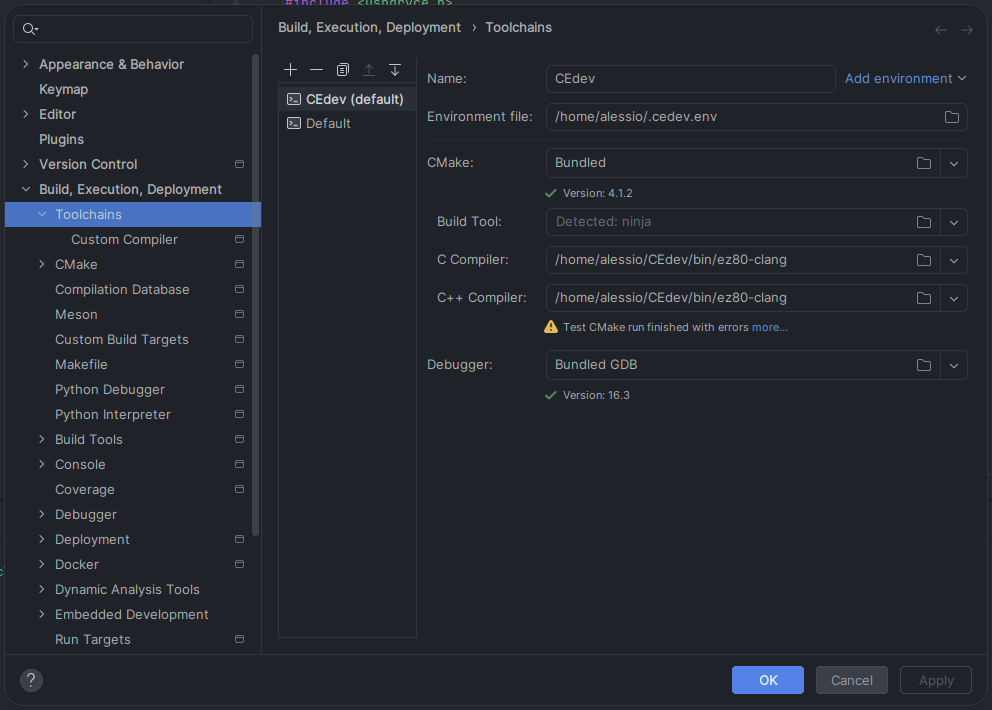
CLion will likely warn that “Test CMake run finished with errors”. This is safe to ignore.
Enable CEdev Toolchain
Set the Makefile Toolchain (Build, Execution, Deployment > Makefile) to your newly created toolchain.

Code assistance should be working now. If you opened a demo project, you should be able to hover over the functions to see documentation/usage.
Build
Before this step, make sure you added your CEdev bin folder to your system’s PATH environment variable, otherwise make won’t be able to find the compiler.
At the top right, five Run Configurations are auto-generated.
Select “all” for the standard build.
Select “debug” for a debug build for use with the CEmu debugging toolchain.
Only use the Build (the hammer icon) button with these. The Run icon tries to run the generated executables, which fails since .8xp files can’t be run natively on a PC.
Visual Studio Code
Open the project using File > Open Folder.
Install Extensions
From the Extensions tab, on the left, install the C/C++, C/C++ Extension Pack, and Makefile Tools extensions.
Open IntelliSense Configurations Screen
Open the Command Palette (Ctrl+Shift+P) and select C/C++: Edit configurations (UI).
Set Compiler Options
Set the value of the “Compiler path” option to be the path to the ez80-clang executable in the bin directory of your toolchain installation, e.g. /home/john/CEdev/bin/ez80-clang.
Also set the “Include path” option to the path to the include directory (e.g. /home/john/CEdev/include). Make sure to remove/replace the original value of ${default}, rather than just adding the path at the end.